
Ever found yourself in a rush, looking for a snack that’s both tasty and good for you? Store-bought snacks might be easy, but they often lack nutrition. This leaves you feeling guilty after each bite.
Imagine making your own homemade granola bars. You can pick the ingredients and flavors you love. This way, you can enjoy healthy snack bars that are both delicious and good for you. Let’s explore how to make your own no-bake granola bars at home.
Key Takeaways
- Discover how to make your own healthy no-bake granola bars.
- Control the ingredients for a personalized snack experience.
- Save money while enjoying nutritious homemade snacks.
- Customize flavors and textures to fit your preferences.
- Learn the health benefits of the ingredients used in your granola bars.
Introduction to Healthy No-Bake Granola Bars
Making your own no bake granola bars is a growing trend. These snacks are a great way to add healthy foods to your diet. Plus, they fit well into busy lifestyles. By making them yourself, you can pick every ingredient, making sure they’re good for you.
Unlike store-bought bars, your diy granola bars don’t have bad stuff like preservatives or too much sugar. Making snacks at home lets you enjoy your favorite tastes without any extra additives. You can try out different recipes to make a bar that’s just right for you.
Benefits of Homemade Granola Bars
Making your own granola bars is great for your health and wallet. It’s a smart choice for those who care about what they eat. You get to enjoy a delicious snack while taking care of your body.
Control Over Ingredients
When you make your own granola bars, you pick what goes in them. This means you can use only the best ingredients and skip the bad stuff. You can make them fit your diet, like gluten-free or vegan.
Healthier Alternatives to Store-Bought Snacks
Store-bought snacks often have too much fat and sugar. Homemade granola bars are a better choice. They’re full of good stuff like grains, nuts, and seeds. Adding chia seeds or dried fruits makes them even healthier.
Cost-Effective Healthy Snack Bars
Homemade granola bars save you money compared to buying them. You can make a lot and keep them for later. This way, you always have a healthy snack ready, without breaking the bank.
Essential Ingredients for Homemade Granola Bars
Making delicious homemade granola bars starts with the right ingredients. It’s important to pick quality grains, nut butters, sweeteners, and mix-ins. This helps create bars that taste great and are good for you.
Choosing the Right Grains
Grains are the base of your granola bars, adding texture and nutrients. Oats are a top choice because they’re full of fiber and keep you full. You can pick between rolled oats or quick oats for different textures. Adding grains like quinoa or brown rice can also mix things up.
Nut Butters and Sweeteners
Nut butters are key for binding ingredients and adding flavor. Almond butter, peanut butter, or sunflower seed butter work well. Sweeteners like honey, maple syrup, or agave nectar add sweetness without processed sugars.
Additions and Mix-Ins
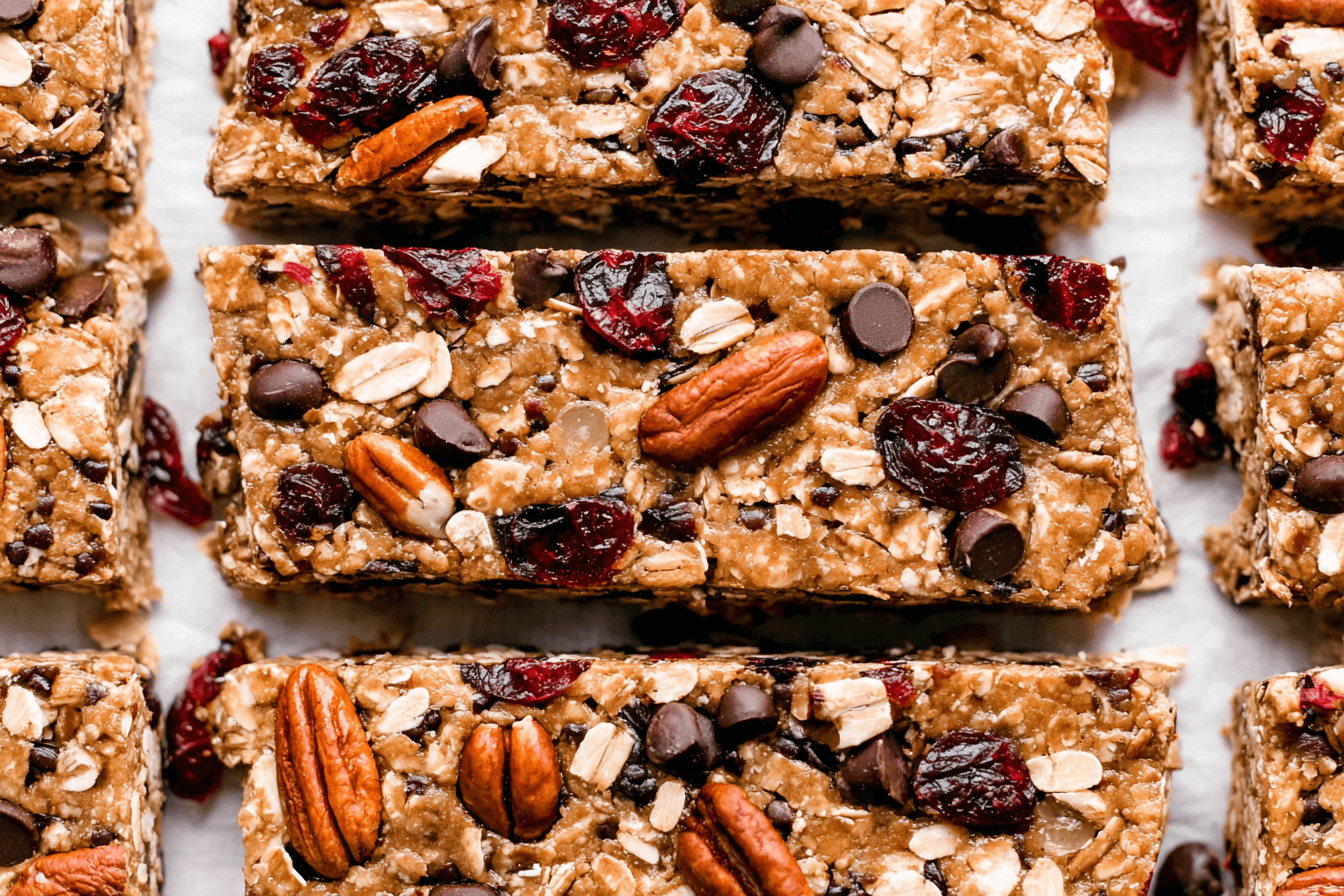
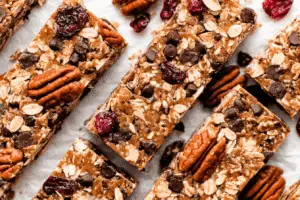
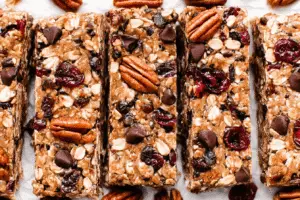
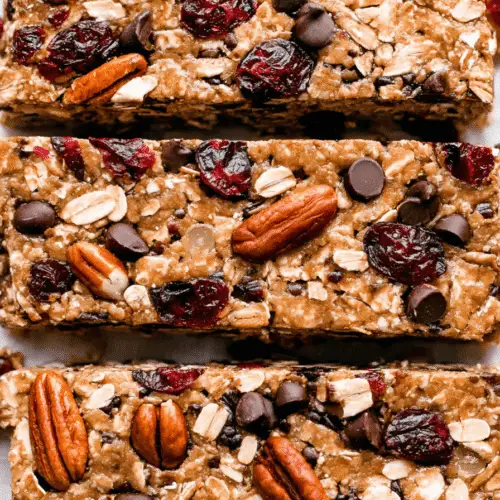
Adding mix-ins can make your oatmeal granola bars even better. Dried fruits like cranberries, apricots, or raisins add sweetness and chewiness. Nuts and seeds like almonds, walnuts, or chia seeds add crunch and healthy fats. Spices like cinnamon or vanilla extract can also add a lot of flavor.
Step-by-Step Guide to Making No-Bake Granola Bars
Making your own no-bake granola bars is fun and rewarding. Follow these steps to make sure your bars turn out great every time. Start by getting all your ingredients and tools ready. This makes mixing and setting easier.
Preparation Tips
Before you start, make sure you have everything you need. You’ll need oats, nut butter, and sweeteners. Also, have a big mixing bowl and a lined baking dish ready. Use measuring cups and spoons to get the right amounts for your no-bake granola bars.
Mixing the Ingredients
Start by mixing your dry ingredients in a bowl. This includes oats, nuts, and seeds. In another bowl, mix the wet ingredients like nut butter and honey until smooth. Then, add the wet ingredients to the dry ones.
Use a spatula to mix everything well. This makes sure all parts are coated evenly. It’s important for tasty, cohesive no-bake granola bars.
Setting the Bars
After mixing, put the mixture in your lined baking dish. Press it down to make an even layer. This helps the bars stick together when they’re set.
Put the dish in the fridge for at least one to two hours. Once it’s firm, cut it into bars or squares. Your no-bake granola bars are now ready to eat or store for later!
Homemade Granola Bars: Customization Options
Creating your own granola bars lets you make a snack that’s just right for you. You can mix and match flavors and textures to your heart’s content. This means you can make something truly special.
Flavor Combinations
Choosing the right flavors can make your bars extra special. Classic combos like peanut butter and chocolate chips are always a hit. But, if you want to try something new, think about coconut and dark chocolate or maple syrup with walnuts.
Adding dried fruits like cranberries or apricots can give your bars a sweet and tangy twist. It’s a great way to add a bit of surprise to your snack.
Texture Variations
The texture of your granola bars is just as important as the flavor. For a crunchy bite, try adding crisped rice or puffed quinoa. Chewy oats or crunchy seeds can also add a fun texture.
Experimenting with different textures can make your bars not only delicious but also exciting. It’s all about finding the perfect mix for you.
Storing Your No-Bake Granola Bars
Keeping your homemade granola bars fresh is important. You can store them at room temperature or in the fridge. For quick access, wrap them in parchment paper or plastic wrap.
For room temperature storage, use an airtight container. This keeps air out and prevents staleness. If you want to keep them longer, the fridge is a good choice. It keeps them fresh for a week or more.
Consider cutting your bars into individual pieces before storing. This makes them easy to grab for a quick snack. Label the container with the date you made them. These tips will help your granola bars stay tasty for days or weeks.
| Storage Method | Temperature | Shelf Life | Best For |
|---|---|---|---|
| Airtight Container | Room Temperature | 5-7 days | Quick Snacks |
| Refrigerator | Cool | 1-2 weeks | Longer Enjoyment |
| Freezer | Below Freezing | Up to 3 months | Extended Storage |
Using Granola Bars as Healthy Snacks
Homemade healthy granola bars are not just tasty; they’re also great for any time. Need a quick snack while out or a boost before the gym? These bars give you the energy you need all day long.
On-the-Go Options
Busy days? A homemade granola bar can save the day. They’re small enough to carry in your bag or backpack. Perfect for:
- Commutes to work or school
- Traveling long distances
- Busy days filled with errands
With many ingredients, you can make them just how you like. They’re a great snack whenever you need one.
Pre- or Post-Workout Fuel
Need energy for your workout? Homemade granola bars are here to help. They’re full of nutrients that:
- Boost your energy before exercise
- Help muscles recover after
- Keep your blood sugar steady
Easy Granola Bar Recipe: Quick Tips
Making your own homemade protein bars is fun and rewarding. To make it even easier, prep your ingredients in batches. Measure out nuts, oats, and other mix-ins ahead of time. This way, you can quickly make a batch when you’re ready.
Save time by using a food processor to chop nuts or blend nut butters. Mix all the ingredients in one big bowl. This way, you avoid using many dishes and make sure everything is well mixed. Remember, pressing the mixture tightly into your pan is crucial for making sturdy bars.
For storing, wrap each bar in parchment paper and put them in an airtight container. This keeps them fresh and makes them easy to grab on the go. You can also freeze extras for later. This way, you always have a healthy snack ready.
Health Benefits of the Ingredients Used
Learning about the health perks of homemade granola bar ingredients can inspire you to pick better ingredients. Nut butters, oats, flaxseed, and wheat germ each bring special nutritional benefits. These benefits make your oatmeal granola bars not only tasty but also healthy.
Peanut Butter and Almond Butter Benefits
Nut butters like peanut butter and almond butter are full of good fats and protein. They are great for your homemade granola bars. These butters are rich in vitamin E, magnesium, and potassium.
Their deep flavor also helps hold the bars together. This makes for a tasty treat.
Importance of Oats in Your Diet
Oats are key in oatmeal granola bars, offering whole grains good for your heart. They are high in fiber, which helps control cholesterol and aids digestion. Oats also give you energy all day long, perfect for athletes and busy people.
Flaxseed and Wheat Germ Nutritional Value
Flaxseed and wheat germ add extra health benefits to your homemade granola bars. Flaxseed is rich in omega-3 fatty acids and lignans, which may lower heart disease risk. Wheat germ is packed with vitamins B and E, plus zinc and iron.
Together, these ingredients make your bars more nutritious. They nourish your body and please your taste buds.
Exploring Other Granola Bar Recipes
If you love making homemade granola bars, why not try exploring granola bar recipes with a twist? You can find recipes that add fun and tasty alternatives to your snacks. For example, chocolate protein granola bars mix protein with chocolate for a sweet treat that keeps you energized.
Vegan fans can find homemade protein bars made with plant-based ingredients. These bars use almond butter, chia seeds, and coconut. They’re perfect for a vegan diet and taste great.
Looking for something healthy? Try adding superfoods to your granola bars. Goji berries, spirulina, and hemp seeds not only look good but also offer health benefits. They let you create bars that are both delicious and nutritious.
Want to make your granola bars more exciting? Try new recipes and flavors. Each batch can introduce you to new tastes that you’ll love. It’s a fun way to keep your snacks interesting and healthy.
Common Mistakes to Avoid When Making Granola Bars
Making your own no bake granola bars can be fun and rewarding. To make them better, it’s key to know the common mistakes. Avoiding these mistakes will help you achieve the perfect texture, taste, and satisfaction.
Overmixing the Ingredients
When mixing, remember not to overdo it. Overmixing can make your granola bars too mushy. This can ruin the balance of crunch and chewiness you want. Just mix until everything is combined, leaving some texture.
Not Allowing Enough Time to Set
Another big mistake is not letting the bars set long enough. This step is crucial for them to stick together well. If you cut them too soon, they might crumble and be hard to handle. Let them set in the fridge for at least an hour. This extra time will make your treat much better.
Conclusion
Making your own no-bake homemade granola bars is easy and rewarding. You’ve learned how simple it is to make these tasty bars. They fit your diet and let you choose the ingredients.
These homemade bars are a great choice for snacks. They give you energy or satisfy your cravings after exercise. You can make them your own way, so they’re both healthy and delicious.
Get creative with your homemade granola bars. You can try different flavors and textures. This way, you’ll enjoy every bite and make healthier choices for your lifestyle.
If you enjoyed these homemade granola bars, you’ll also love trying other easy and delicious treats from our kitchen. For more no-bake inspiration, check out our Banana Pudding Rice Krispies, or explore indulgent dessert bars like our Butterscotch Toffee Cookie Bars. If you’re looking for a wholesome breakfast option, don’t miss our Brownie Batter Overnight Oats for a nutritious and satisfying start to your day.
Healthy No-Bake Homemade Granola Bars
Ingredients
Main Ingredients
- 0.75 cup creamy peanut butter or almond butter
- 0.5 cup honey or pure maple syrup
- 1 teaspoon vanilla extract
- 1.5 cups quick oats or rolled oats do not use instant oatmeal
- 0.25 cup ground flaxseed
- 0.25 cup wheat germ or an additional 2 tablespoons oats
- 0.75 teaspoon ground cinnamon or 1 teaspoon pumpkin pie spice
- 0.5 teaspoon kosher salt
- 1.25 cups mix-ins of choice (e.g., dried cranberries, raisins, roughly chopped toasted nuts, chocolate chips, sunflower seeds, etc.)
Instructions
- Prepare the Pan: Line an 8×8 inch baking pan with parchment paper or wax paper, leaving two sides overhanging for easy removal later.
- Make the Peanut Butter Mixture: In a small saucepan, heat the peanut butter and honey over medium heat. Whisk until smooth, then remove from heat and stir in the vanilla extract. Allow to cool for a few minutes, especially if using chocolate chips, to prevent them from melting.
- Mix Dry Ingredients: In a large mixing bowl, whisk together the oats, ground flaxseed, wheat germ, cinnamon, and salt. If you have larger mix-ins, chop them roughly and add them to the oat mixture.
- Combine Wet and Dry Ingredients: Pour the cooled peanut butter mixture over the dry ingredients. Using a wooden spoon or sturdy spatula, mix until everything is well combined. The mixture will be thick and sticky but should hold together when pressed. If it feels too sticky, add a bit more oats; if too dry, drizzle in a little more honey.
- Press into the Pan: Firmly press the mixture into the prepared pan using the back of a large measuring cup or your fingers. Make sure it’s compact to help the bars hold together.
- Chill: Place the pan in the refrigerator for 1 hour to allow the granola bars to set.
- Slice and Serve: Once set, lift the bars out of the pan using the paper handles. If they stick, run a knife around the edges to loosen. Slice into bars of your desired size (about 12 bars total).