
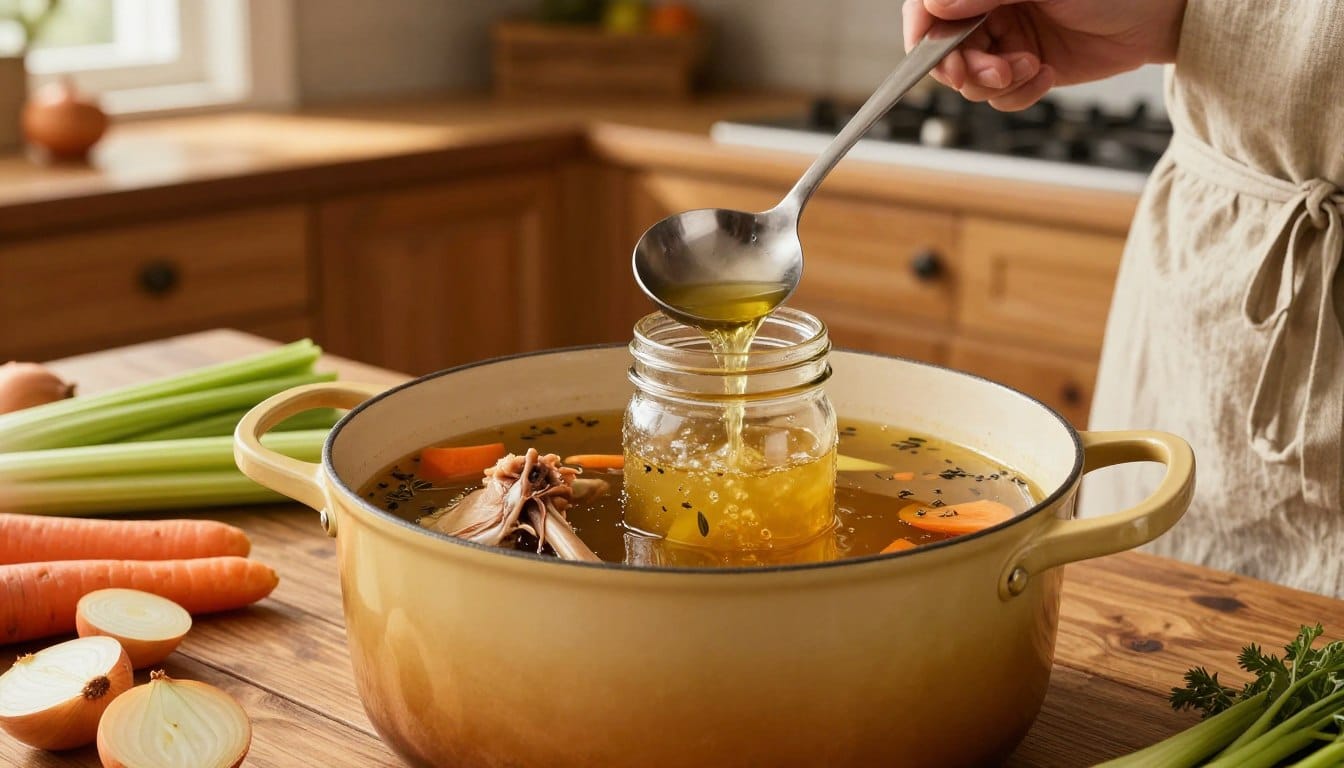
This recipe turns a leftover Thanksgiving turkey carcass into about 8 to 10 cups of rich, golden stock for soups, gravy, rice, and more. It gives you a flavorful way to save the bones for meals you can make later. The stock freezes beautifully, so you can enjoy it for months.
Set aside a little time on the day after your feast, or use the carcass whenever you are ready. Prep takes 15 minutes, and the stock cooks for 3 to 4 hours. Plan on about 3 hours 15 minutes to 4 hours 15 minutes total.
You can use the finished stock right away or freeze it in useful portions. Save this recipe for the next time a roasted turkey leaves you with bones and parts worth turning into something delicious.
Set aside the picked-over carcass and any good meat you want to save before you begin.
Key Takeaways
- Use one cooked turkey carcass with most of the meat removed.
- Keep the stock at a gentle simmer for a clear, savory result.
- Make it on the stove, in a slow cooker, or in an Instant Pot.
- Refrigerate for up to 4 days or freeze for up to 6 months.
- Use the stock in soup, gravy, rice, and other recipes.
What to Save From the Turkey Carcass
Start with 1 leftover turkey carcass, with most of the meat removed, and pick off any good meat you want to serve in soup or sandwiches. Break the carcass into pieces that fit your pot. Homemade turkey stock from a carcass begins with the cooked bird’s bones and most of its meat removed. Save the tender meat before simmering, because hours on the bones will leave it flavorless.
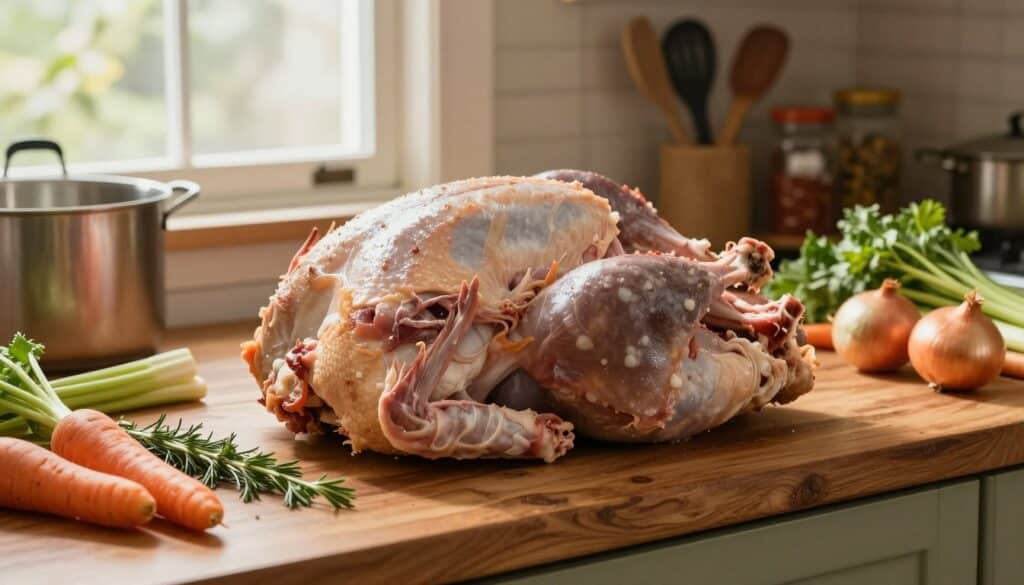
Look over the bird before you put anything in the pot. You may have enough usable meat for a quick lunch, or a later soup with stock from the same carcass. Keep that meat apart from the bones while you work.
- Pick off the good meat and save it for soup or sandwiches.
- Break the carcass pieces apart by hand or with kitchen shears so they fit snugly and sit mostly below the pot’s rim.
- Arrange the pieces snugly, with most of them sitting below the pot’s rim.
Large bones may need a firm bend or a cut at the joints to fit. Choose a stockpot that leaves room for vegetables and water, rather than forcing every piece into a small pot. The bones should rest securely and leave space for the liquid to cover them.
Take the meat you want to eat off the bones before the long simmer; meat left on them will lose its flavor.
Small scraps that cling to the bones can stay in the pot. They add some flavor as the bones cook, but do not count on them for serving portions later. Keep the good pieces you picked off chilled until you need them.
Move cooked turkey leftovers into the refrigerator promptly after the meal. Refrigerate cooked turkey leftovers within 2 hours, or within 1 hour when the room is above 90°F. The same time limit applies to meat you plan to use in another dish.
Break the carcass down before adding water, not after the pot is full. Smaller pieces are easier to arrange and remove, and they help you make better use of the space in your stockpot.
Homemade Turkey Stock from the Carcass
Ingredients
- 1 leftover turkey carcass most of the meat removed, broken into pieces that fit in the pot
- 1 large yellow onion quartered (skin can stay on for a deeper golden color)
- 3 medium carrots scrubbed and cut into large chunks
- 3 celery stalks cut into large chunks
- 6 cloves garlic smashed with the flat of a knife
- 2 bay leaves
- 1 teaspoon whole black peppercorns
- 4 to 5 sprigs fresh thyme
- 8 sprigs fresh parsley
- 12 cups cold water or enough to cover everything by about 1 inch
- 1 teaspoon apple cider vinegar (optional, helps draw flavor and minerals from the bones)
- Salt to taste, added at the end (optional)
Instructions
- Place the turkey carcass pieces in a large stockpot, breaking the carcass apart so it fits snugly below the rim.
- Add the onion, carrots, celery, garlic, bay leaves, peppercorns, thyme, and parsley.
- Pour in cold water until everything is covered by about 1 inch. Add the apple cider vinegar if using.
- Bring slowly to a gentle simmer over medium heat. Do not let it reach a hard rolling boil.
- During the first 30 minutes, skim off any foam that rises to the top and discard it.
- Reduce the heat to low and simmer gently, uncovered, for 3 to 4 hours, topping up with water if needed.
- Turn off the heat, let cool slightly, lift out the large solids, then strain through a fine-mesh strainer into a clean pot. Discard the solids.
- Cool quickly in a sink of ice water, then refrigerate.
- Once chilled, skim the solidified fat from the surface if you like. Season with salt to taste.
- Use right away, refrigerate up to 4 days, or freeze up to 6 months.
Notes
What Goes Into Homemade Turkey Stock?
You need a carcass, a few familiar aromatics, fresh herbs, and cold water to build a full-flavored stock. The simple ingredients bring out the savory taste of the turkey without hiding it. Cold water helps the stock stay clear as it heats.
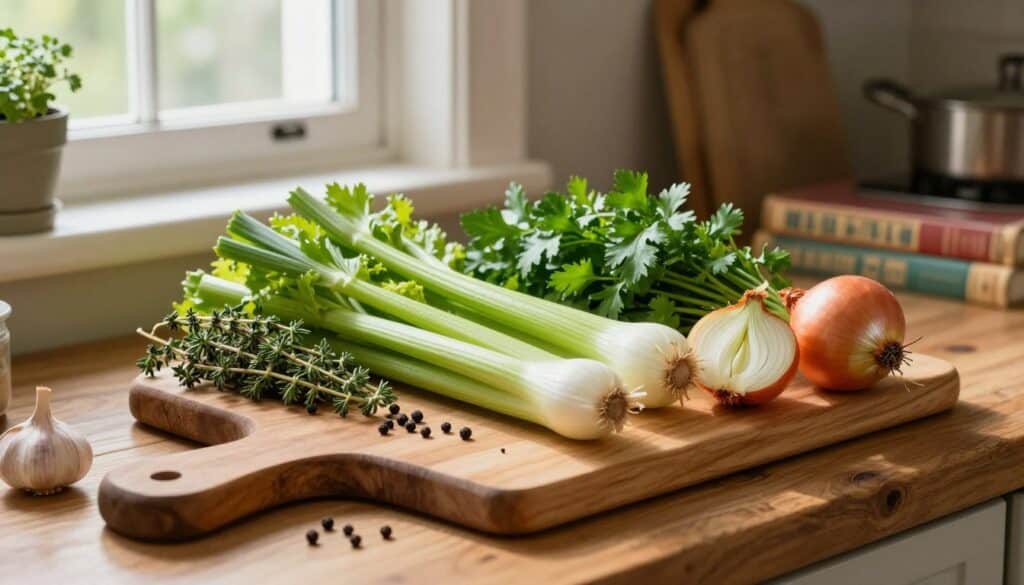
Gather these ingredients before you fill the pot. The vegetables can be cut in large pieces because they will flavor the liquid, not serve as a finished side dish.
- 1 large yellow onion, quartered; leave the clean skin on for a deeper golden color, if you like
- 3 medium carrots, scrubbed and cut into large chunks
- 3 celery stalks, cut into large chunks
- 6 garlic cloves, smashed with the flat of a knife
- 2 bay leaves
- 1 teaspoon whole black peppercorns
- 4 to 5 sprigs fresh thyme
- 8 sprigs fresh parsley
- 12 cups cold water, or enough to cover everything by about 1 inch
- 1 teaspoon apple cider vinegar, optional
- Salt to taste at the end, optional
A clean onion skin can deepen the color without adding extra work. Remove any dirty or damaged outer layers first, then quarter the onion and leave the clean skin attached. This small choice can give your turkey stock a warmer golden hue.
Apple cider vinegar is optional, not a must-have. It can help draw flavor and minerals from the bones during cooking. Use the small amount listed; the finished stock should not taste sharply sour.
Cold water gives the ingredients a gradual start as the pot warms. That slow rise helps keep the liquid clear, while the vegetables, herbs, garlic, and peppercorns build its savory base.
You can adjust the salt after cooking, when you know how concentrated the stock tastes. Leave salt optional until the finished stock is ready to taste. This also makes the stock easier to use in recipes that already contain salt.
The onion, carrots, celery, and herbs are classic stock ingredients for good reason. They add depth while letting the turkey remain the main flavor. Fresh thyme and parsley give the pot a clean herbal note.
How to Make the Stock on the Stovetop
A slow, gentle simmer extracts the carcass’s flavor while helping the stock stay clear. The best homemade turkey stock in this recipe comes from bones, aromatics, and steady, gentle heat. Small bubbles should lazily break the surface, not churn the liquid.
To make turkey stock from bones, cover them with cold water and simmer gently until the liquid tastes deeply savory. Follow these five steps, and keep an eye on the water as the pot cooks.
Load the Stockpot and Start Cold
- Add the turkey carcass pieces to a large stockpot. Tuck the onion, carrots, celery, garlic, bay leaves, peppercorns, thyme, and parsley around the bones.
- Pour in cold water until it covers the bones and vegetables by about 1 inch. Add the optional apple cider vinegar now, if using.
- Set the pot over medium heat and bring it slowly to a gentle simmer. Avoid a hard rolling boil, which can make stock cloudy and greasy.
A gradual warm-up helps the flavors move into the water without rough agitation. Once the surface begins to move, adjust the heat so the bubbles stay small and lazy. Do not let the pot reach a hard boil.
Hold a Gentle Simmer for 3 to 4 Hours
- During the first 30 minutes, skim off any foam or scum that rises to the surface. Discard it rather than stirring it back into the liquid.
- Reduce the heat to low and simmer the pot uncovered for 3 to 4 hours. Check now and then to make sure the liquid still covers the bones.
- If the water level drops below the bones, top up the pot with a little water. Keep the simmer gentle as the stock cooks.
The best stovetop setting is the lowest heat that keeps small bubbles lazily breaking the surface. A rolling boil stirs fat and fine particles through the liquid, leaving it cloudy and greasy. Use the look of the surface as your guide, not a fixed burner number.
As the hours pass, the liquid should take on a rich golden color. Taste a spoonful near the end of the cooking time. The turkey stock is ready when it tastes deeply savory and has gained clear color from the bones and vegetables.
Use the recipe’s 3-to-4-hour window, then judge the result by its color and flavor. A longer cook is not automatically better, and the vegetables can lose their fresh taste if they simmer too long.
Keep the bubbles lazy rather than letting the pot reach a rolling boil.
Slow Cooker and Instant Pot Methods
Choose the slow cooker for a longer hands-off cook or the Instant Pot for a pressure-cooked batch. Both alternatives use the same ingredients as the stovetop method, then get strained, cooled, and stored after cooking. Match the liquid level to the appliance you choose.
Use the table to compare the cooking time and liquid guidance. Never fill the Instant Pot above its max fill line. The cooker needs room for safe pressure cooking.
| Method | Setting | Cooking time | Liquid guidance |
|---|---|---|---|
| Stovetop | Low after a gentle simmer | 3 to 4 hours | Cover by about 1 inch |
| Slow cooker | LOW | 8 to 10 hours | Cover with water |
| Instant Pot | HIGH pressure | 45 minutes plus a 20-minute natural release | Fill only to the max line |
Slow Cooker Method
Add the carcass and the recipe’s aromatics to the slow cooker. Pour in enough water to cover everything, then set the cooker to LOW for 8 to 10 hours. This longer cook lets you leave the pot alone while the flavors develop.
When the cooking time ends, strain the liquid and discard the solids. Cool the stock and store it as directed. The cooker’s lid helps hold in moisture, so check that the bones and vegetables are covered when you first load it.
Instant Pot Method
Place the turkey carcass and aromatics in the Instant Pot, then add water only up to the max fill line. Seal the lid and cook at HIGH pressure for 45 minutes. Allow the pressure to release naturally for 20 minutes before opening the pot.
After the natural release, strain the stock and discard the solids. Cool and store it as directed. Pressure cooking shortens the active cook, but the hot liquid still needs careful handling when you strain it.
Both methods use the same recipe ingredients, but their liquid limits differ. A slow cooker can be covered with water, while the Instant Pot has a marked fill limit. Use the max line as the absolute limit, not a suggestion.
If you have a smaller Instant Pot, you may need to use less water or a smaller carcass portion. Do not pack the ingredients so tightly that liquid cannot move around them. Leave enough room below the Instant Pot’s max fill line when adding the water.
Strain and Cool the Stock Safely
Set up a large bowl or clean pot and a fine-mesh strainer before lifting out the cooked bones and vegetables. Turn off the heat and let the stock cool slightly first. Work carefully around the hot liquid and heavy bones.
Use tongs to lift the large bones and vegetables out of the pot. Then pour the remaining liquid through the strainer into your bowl or clean pot. Line the strainer with cheesecloth if you have it.
Discard the bones, vegetables, and other solids after straining. They have given their flavor to the stock and are no longer useful for this recipe. Let the strained liquid cool just enough to handle safely before moving it.
To cool the stock quickly, set the bowl or pot in a sink filled with ice water. Stir the liquid from time to time so the warmer stock in the center cools too. Add more ice if the bath warms before the stock is ready to refrigerate.
Divide the stock into small portions in covered, shallow containers. These containers cool faster than one deep, full pot. Keep cold perishable food at 40°F or below, and refrigerate the stock promptly once it has cooled.
After chilling, the fat may form a solid layer on the surface. Skim it off if you prefer a leaner stock, or leave some for a richer taste. Season the finished stock with salt to taste.
Smaller containers are easier to cool and later fit into the refrigerator. Avoid leaving the full pot on the counter while you wait for it to become cold. Keep the stock at 40°F or below once it is cold.
Store and Freeze Turkey Stock
Use the stock right away, refrigerate it for up to 4 days, or freeze it for up to 6 months. Frozen portions make it easy to enjoy the stock in future meals. The recipe’s freezer window is for best quality.
Pick a container based on how you plan to cook. A large batch can be useful for soup, while a small portion suits gravy or a pan of rice. Leave room at the top of a freezer-safe container for the liquid to expand as it freezes.
Refrigerate Stock for Short-Term Use
For short-term use, store the cooled stock in a covered container in the refrigerator. Use it within 4 days, and keep the fridge cold enough for perishable food. Write the date on the container if several batches share the shelf.
Once chilled, the stock may look different from the smooth liquid you poured into the container. A layer of fat may firm up on top, and a thin gel can form beneath it. These changes do not mean the stock has spoiled.
Choose a container with a tight-fitting lid to protect the stock from spills and other food odors. If you will use only part of a batch, divide it before chilling. That way, you can open just the amount you need.
Freeze Portions for Later
Turkey stock freezes beautifully for months, making it a useful start for a future meal. Freeze it for up to 6 months for the best quality. Ice cube trays and small containers make easy portions.
Once the cubes are firm, move them into a freezer-safe bag or container. Label the package with the date and amount, so you can choose a useful quantity without thawing the whole batch. Small containers also work well when you want a cup or two at a time.
Frozen food kept at 0°F stays safe indefinitely, while frozen leftovers are best used within 2 to 6 months for quality. This recipe uses a clear six-month window for the best stock quality. Keep the stock frozen solid between uses.
For a quick meal, thaw only the amount you need and add it to the pot or pan. If you freeze a mix of cube sizes and larger portions, you can measure stock more easily for different recipes. Portion the stock before freezing so you can thaw only what a recipe needs.
Ways to Use Turkey Stock in Leftover Recipes
Homemade turkey stock is the best fit for turkey soup when you want the leftover bird’s savory flavor in the broth. Turkey noodle soup can build on that base with carrots, celery, garlic, herbs, and onion. Start with the stock and add the other ingredients you enjoy.
The same liquid can add flavor to meals beyond soup. Use it wherever a recipe calls for broth or water, and let the turkey flavor support the dish without overpowering it.
- Stir turkey stock into soups and stews for a savory base.
- Use it to make gravy with a rich turkey taste.
- Cook rice in stock instead of plain water for more flavor.
- Add it to leftover turkey pot pie filling or other next-day recipes.
Turkey stock also works when you cook mashed potatoes. Replace some of the usual cooking liquid with stock for a savory note. Start with a small amount, then adjust the seasoning once the potatoes are ready.
If you want another turkey meal, pair the stock with a slow cooker turkey breast roast. It gives you another way to serve turkey, even when you are not using leftovers. Use stock or water as the recipe directs.
For a hearty dinner, a slow cooker Korean chicken stew offers a different path for a flavorful stock-based meal. It combines chicken, vegetables, and a spicy-sweet sauce, then works well over rice or with noodles.
Stock brings a steady savory base, but the final seasoning still belongs to you. Taste the soup, gravy, or rice as it cooks and adjust salt and herbs to suit the other ingredients. Reheated leftovers should reach 165°F at the center.
Use a food thermometer to check the thickest part of a reheated dish, especially a filling with chunks of turkey. Heat the whole portion evenly rather than relying on a hot edge or bubbling surface. Check the center of reheated leftovers with a food thermometer and bring it to 165°F.
Turkey Stock vs. Broth: What Changes?
Stock is the bone-based liquid simmered for hours, while broth is made with meat, vegetables, and seasonings and cooks relatively quickly. The main difference is what goes into the pot and how long it cooks. Turkey stock starts mainly with bones; turkey broth cooks faster with meat and seasonings.
People often use the names in similar ways, especially in everyday cooking. The terms still point to different methods, and the finished liquid can have a different body or texture.
Stock, Broth, and Bone Broth
| Name | Main ingredients | Cooking approach | What to expect when chilled |
|---|---|---|---|
| Turkey stock | Primarily bones | Simmered for hours | May set into thin gelatin |
| Turkey broth | Meat, vegetables, seasonings | Cooked relatively quickly | Typically remains more liquid |
| Bone broth | Bones | Long-simmered, bone-based stock | Can set into thin gelatin |
A thin gel in chilled turkey stock is a sign that it is collagen-rich. The gel liquefies again when you heat the stock, so you can use it just like a liquid in a recipe. Its texture may look firm in the refrigerator, then turn silky in a warm pan.
Bone broth is a commonly used term for long-simmered, bone-based stock. It can also form a thin gel after chilling. That change is a normal result of the stock’s collagen, not a sign that you need to add anything.
Keep the Simmer Within the Recipe Window
Yes, turkey stock can simmer too long for the best flavor. Extended cooking can dull the freshness of the vegetables, even when the bones keep adding depth. Use the recipe’s golden color and deeply savory taste as the doneness cues.
Longer cooking does not always mean a better stock. The vegetables are there to add balance, and their fresh notes can fade during an extended simmer. Stop when the stock tastes full and looks golden rather than leaving it on the heat all day.
A thin gel after chilling is a normal sign of collagen-rich stock.
A gentle cook helps keep the taste clean and the texture pleasant. When you compare turkey stock and turkey broth, remember that the broth uses meat, vegetables, and seasonings for a quicker cook. A thin gel after chilling is a normal sign of collagen-rich stock.
Conclusion
Saving the carcass turns a Thanksgiving leftover into a useful starting point for future meals. Homemade turkey stock gives soups, gravy, rice, and other recipes a deeper savory base. You can also freeze portions, so the flavor of one roasted turkey can help with meals long after the holiday.
Keep a few container sizes on hand to match the way you cook. A small portion can season a side dish, while a larger one can start a pot of soup. Set aside your next turkey carcass and choose a freezer portion size that suits the recipes you make most.